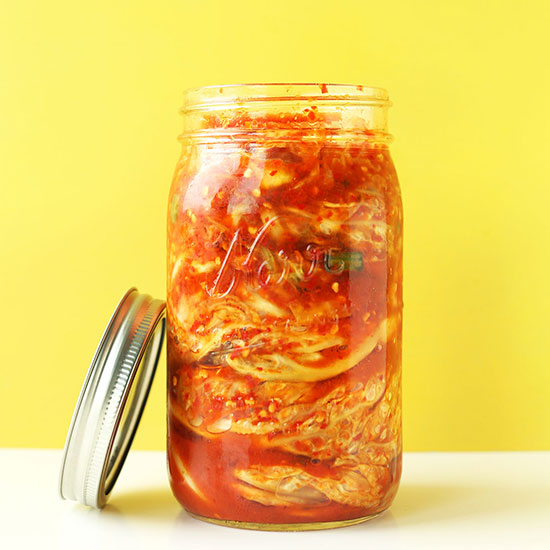
Easy Vegan Kimchi
4.8
(45)
Your folders
Your folders
Prep Time: 2400 minutes
Total: 2400 minutes
Servings: 15
Cost: $2.21 /serving
Author : Minimalist Baker
Ingredients
Export 9 ingredients for grocery delivery
Instructions
Step 1
Make sure that you are using clean surfaces and utensils and are washing your hands throughout the process of preparing your kimchi in order to prevent introducing bad bacteria and disrupting the fermentation process. The photos provide step-by-step instructions, so if you get lost, refer back to those.
Step 2
Start by quartering your well-rinsed and dried cabbage (savoy or napa) and carefully removing the bottom core (hard white section) with a sharp knife. Discard.
Step 3
Next place your cabbage in a large mixing bowl and begin packing a generous amount of sea salt in between each of the leaves. Do so by lifting each individual leaf and sprinkling with sea salt. Repeat until all leaves have been salted. Then press down and let rest for 30 minutes. This softens and breaks down the cabbage, drawing out moisture, priming it to be coated in the sauce.
Step 4
While your cabbage rests, prepare your vegan fish sauce by adding all ingredients to a small mixing bowl and whisking to combine. Set aside.
Step 5
Next, prepare your chili sauce by adding fresh ginger, garlic, onion and red chili flake to a food processor or blender. I started with 1/2 cup chili flake and found it to be quite spicy (as I prefer). So if you desire less heat, start at 3-4 Tbsp and work your way up (amounts as original recipe is written // adjust if altering batch size). Taste and adjust flavor as needed.
Step 6
Add vegan fish sauce to this mixture and pulse to combine. Set aside.
Step 7
At this time, your cabbage should be ready to flip. Wash your hands and turn each section of cabbage over so it's facing the opposite direction. Then pack down with hands to compress. You'll repeat this process 3 more times (for a total of 4 times), waiting 30 minutes in between, and washing hands before touching cabbage.
Step 8
In the meantime, add your chopped carrots and green onion (optional) to a medium mixing bowl, along with the sauce. Stir to combine, then cover and set aside.
Step 9
While waiting, this is a good time to sterilize your storage containers. Bring a pot of water to a boil and place your containers (I used 1 large mason jar, and 1 small glass container // as original recipe is written // adjust if altering batch size), in a clean sink and pour the boiling water over top. Let containers cool slightly, then dry with a clean towel and set aside.
Step 10
Once you have flipped your cabbage 4 times (it should be tender and shrunken down quite a bit), it's time to rinse. In very cold water, rinse each section of cabbage to remove excess salt, then place on 2-3 absorbent clean towels and pat dry. Also separate the cabbage leaves at this time, so they're easier to work with.
Step 11
Rinse and dry the mixing bowl the cabbage was in, then return the dried cabbage to the bowl. Get your sauce with carrots and green onions and begin coating each leaf with the sauce. If you have gloves (disposable or rubber), use them at this time as the sauce can irritate sensitive hands (I didn't, but thought it was worth mentioning).
Step 12
Be generous when coating, but also keep in mind you need enough sauce to coat all of the cabbage. Once the cabbage is thoroughly coated with sauce, wash hands and get your sterilized storage container(s).
Step 13
With clean hands, begin placing the coated cabbage leaves in the container, packing down to ensure there is as little air as possible between leaves. Continue until all cabbage is packed in, then press down very firmly to remove air. Top with clean, sterilized lid, and set in a cool dark place (such as a cabinet, not the refrigerator) to ferment.
Step 14
How long to ferment is up to you. The resource I used suggested 36 hours minimum, then transfer to the refrigerator for 1 week to ferment longer. I fermented mine for about 48 hours, but next time I think I'll do 1 week for softer cabbage and a more intense fermented flavor.
Step 15
The longer you ferment the kimchi, the tangier and intense the flavor will be, and the more tender the cabbage will become. From what I've read, I wouldn't ferment for more than 21 days.
Step 16
Each day it ferments, open up and press down with a clean utensil, such as a spoon, to press out air bubbles and ensure the kimchi is immersed in liquid. A good sign of proper fermentation is seeing little bubbles in the sauce when you press down.
Step 17
A good indicator of when it's done fermenting is the smell. If it smells pleasant to the nose and tangy, like the kimchi you're used to trying, it's probably ready to transfer to the refrigerator.
Step 18
Kimchi will keep in the refrigerator for at least 3-4 weeks, and even months. You'll know it's gone bad if mold has formed or the smell is sour or unpleasant.
Step 19
How to enjoy kimchi?! This makes a great addition or side to any Asian dish, such as Easy Vegan Fried Rice, Vietnamese Spring Rolls, or General Tso's Tofu Stir Fry.