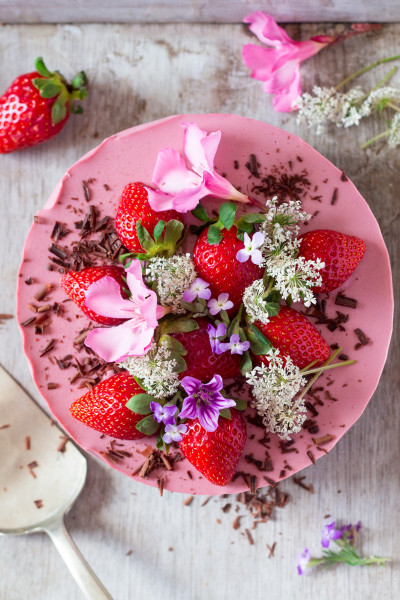
Vegan strawberry cheesecake (oil-free)
4.9
(18)
Your folders
Your folders
Prep Time: 30 minutes
Cook Time: 10 minutes
Servings: 11
Cost: $3.07 /serving
Author : Ania
Ingredients
Export 10 ingredients for grocery delivery
Instructions
Step 1
Line the bottom of your spring form tin (mine was 16 cm / 6 " across and 6.5 cm / 2.5 " tall) with a circle of baking paper and cut out a long rectangle to line the sides with.
Step 2
Grind your almonds in a food processor until you get a coarse crumb. Take them out of the food processor and set aside.
Step 3
Drain your dates and chop them roughly. Put into a food processor and process into a paste. Add cacao powder and a bit of salt to taste and process some more.
Step 4
In a bowl, mix date paste with enough ground almonds to obtain a dough that isn't too sticky yet still holds together well. I prefer doing it by hand to get a feel for exactly how many almonds I should be adding.
Step 5
Line the sides of the baking tin and then mould the base mixture to the bottom of your spring form tin. Press the mixture down well with your fingers so that there are no gaps / air-bubbles. Put a bit if baking paper on top of the base and weigh it down with something heavy (I used a round container of similar size, filled with sugar). Put into the fridge while you make your cheesecake mixture.
Step 6
Just before you are ready to start blending the cheesecake, put agar flakes, ½ cup of reduced aquafaba (or water if you don't want to use aquafaba) and ½ cup of coconut cream into a small pot. Let the mixture come to the boil and simmer on low-medium heat, stirring frequently, until flakes almost dissolve and the mixture thickens (about 15 mins). From that point onwards, you'll need to work fast as agar sets as soon as it cools down.
Step 7
Chuck maple syrup, de-stemmed strawberries and cashews (in this order) into the blender. Blend until smooth. Once smooth add activated agar mixture into a blender. Blend, scraping the sides of the blender from time to time if needed. Adjust the sweetness to taste. Blend until completely smooth.
Step 8
As soon as the cheesecake mixture is super smooth, take the spring form tin out of the fridge and pour the cheesecake mixture on top of the set base. Make sure you do it very quickly to get a smooth finish as, like I mentioned before, agar sets very quickly. Gently hit the filled spring form tin against your work surface a few times to get rid of air pockets/bubbles.
Step 9
You don't need to put this cheesecake into the freezer as it will set beautifully at room temperature or in the fridge. Once set, decorate at will.