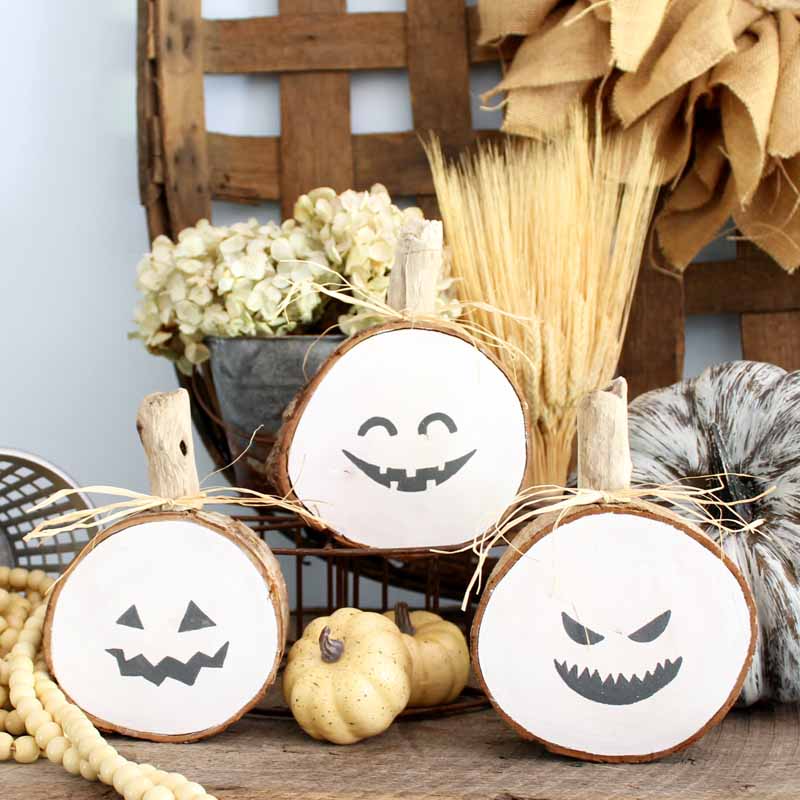
DIY Wooden Pumpkins
Your folders
Your folders
Total: 15
Ingredients
Export 7 ingredients for grocery delivery
Instructions
Step 1
Paint one side of your rustic wood slices with white paint. Leave the bark around the edges unpainted. For a rustic look, only use one light coat of paint. Allow to dry completely before continuing.
Step 2
Then get your pumpkin pattern using the form above and print.
Step 3
Place the pumpkin pattern on the white painted side of your wood slice. Tape or hold in place and use a pen to trace around all of the details pressing down well. Trace only the facial features.
Step 4
After tracing, lift up your paper and you will see a slight indent in your wood slice everywhere you traced the pattern. These make the perfect guides for painting.
Step 5
Add dark paint (in this case a dark grey) in the outline areas. Again, I only added one coat because I wanted rustic wooden pumpkins. You can add several coats of paint if you would like.
Step 6
Allow your pumpkin faces to dry then use hot glue to add on a driftwood stem and tie on some raffia to complete the look.
Top similar recipes
Curated for youYour folders
 224 views
DIY Inexpensive Wooden Carving Boar...
myturnforus.com
Your folders
 73 views
DIY Wooden Yarn Card Organizers
dreamalittlebigger.com
Your folders
 85 views
Ikea Hack DIY Wooden Headboard With...
sugarandcloth.com
Your folders
 253 views
How to Make a DIY Patriotic Wooden ...
thecountrychiccottage.net
Your folders
 219 views
Wooden Easter Bunnies
thecountrychiccottage.net
Your folders
 85 views
Wooden Pencil Holder
thecountrychiccottage.net
Your folders
 785 views
Pepperoni Pizza Pumpkins
omgchocolatedesserts.com
3.3
(4)
20 minutes
Your folders
242 viewsPepperoni Pizza Pumpkins
omgchocolatedesserts.com
3.3
(4)
20 minutes
Your folders
 238 views
Baked Miniature Pumpkins
allrecipes.com
4.5
(35)
Your folders
 138 views
Rice Krispie Pumpkins
butterwithasideofbread.com
Your folders
 86 views
Pizza-Stuffed Pumpkins
delish.com
5.0
(1)
Your folders
 114 views
Roasted Baby Pumpkins
williams-sonoma.com
45 minutes
Your folders
261 viewsRecipes - The Wooden Palate
thewoodenpalate.com
Your folders
 274 views
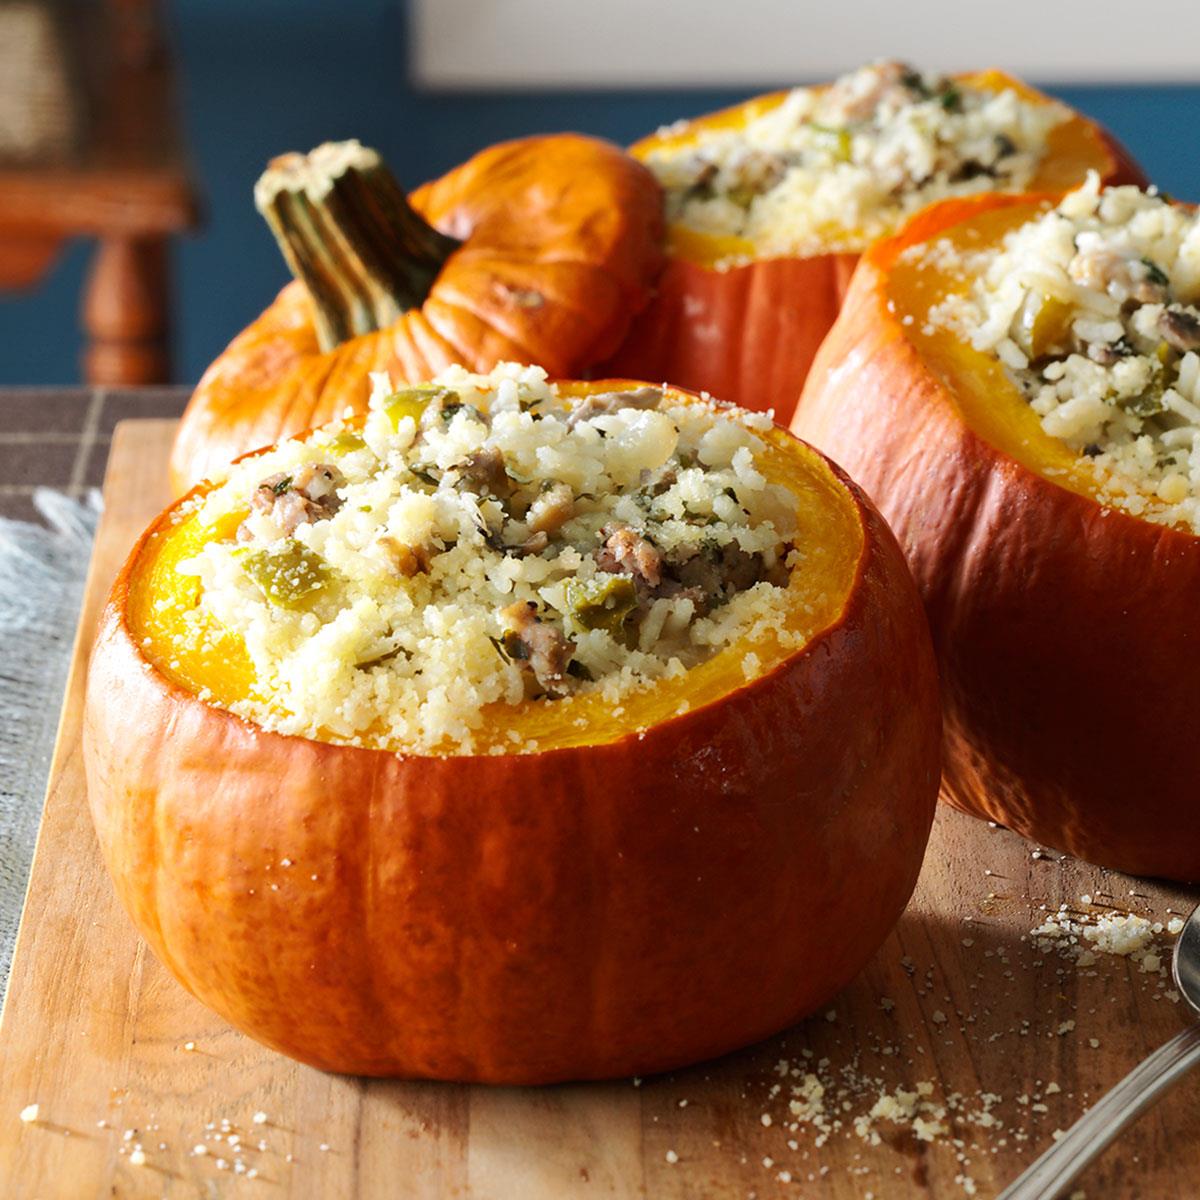
Sausage & Rice Stuffed Pumpkins
tasteofhome.com
4.0
(1)
55 minutes
Your folders
 262 views
Pumpkin Cheesecake Stuffed Pumpkins
lecremedelacrumb.com
4.0
(3)
25 minutes
Your folders
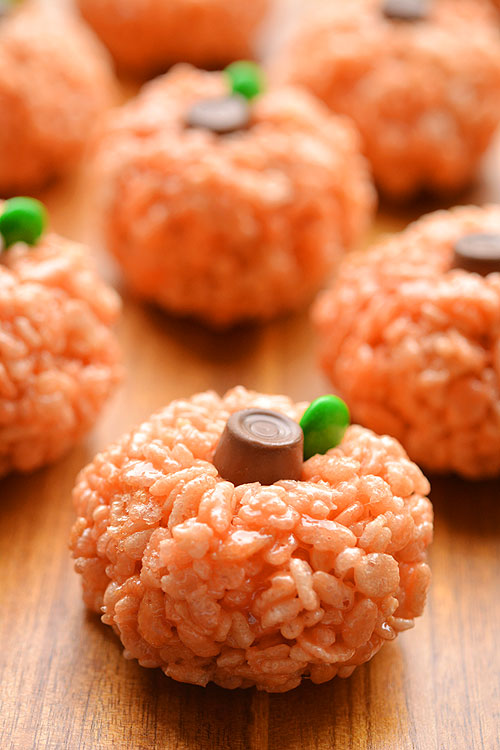 436 views
Rice Krispie Treat Pumpkins
onelittleproject.com
4.7
(14)
Your folders
 137 views
Dollar Tree Rope Pumpkins
itsalwaysautumn.com
Your folders
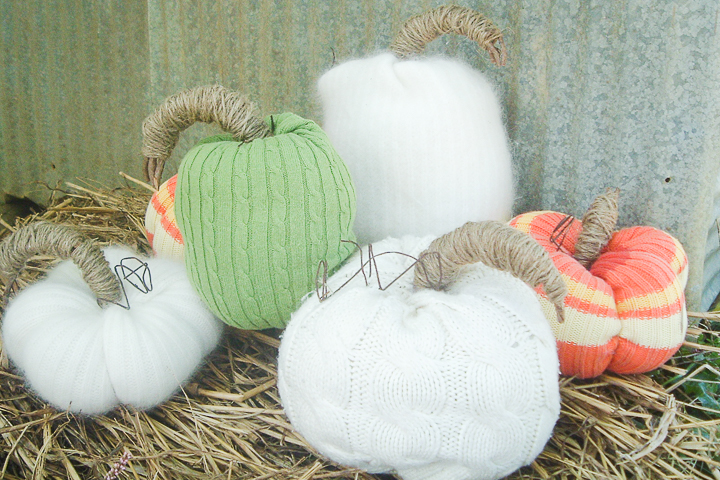 289 views
No Sew Sweater Pumpkins
thecountrychiccottage.net
Your folders
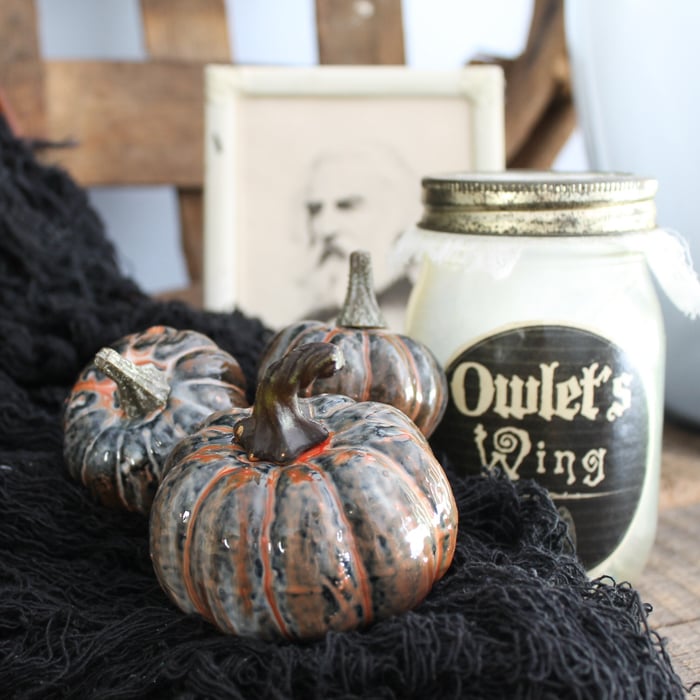 245 views
Marbled Pumpkins with Resin
thecountrychiccottage.net